Sunday, December 30, 2012

Taurus Feltie

DSCN0041
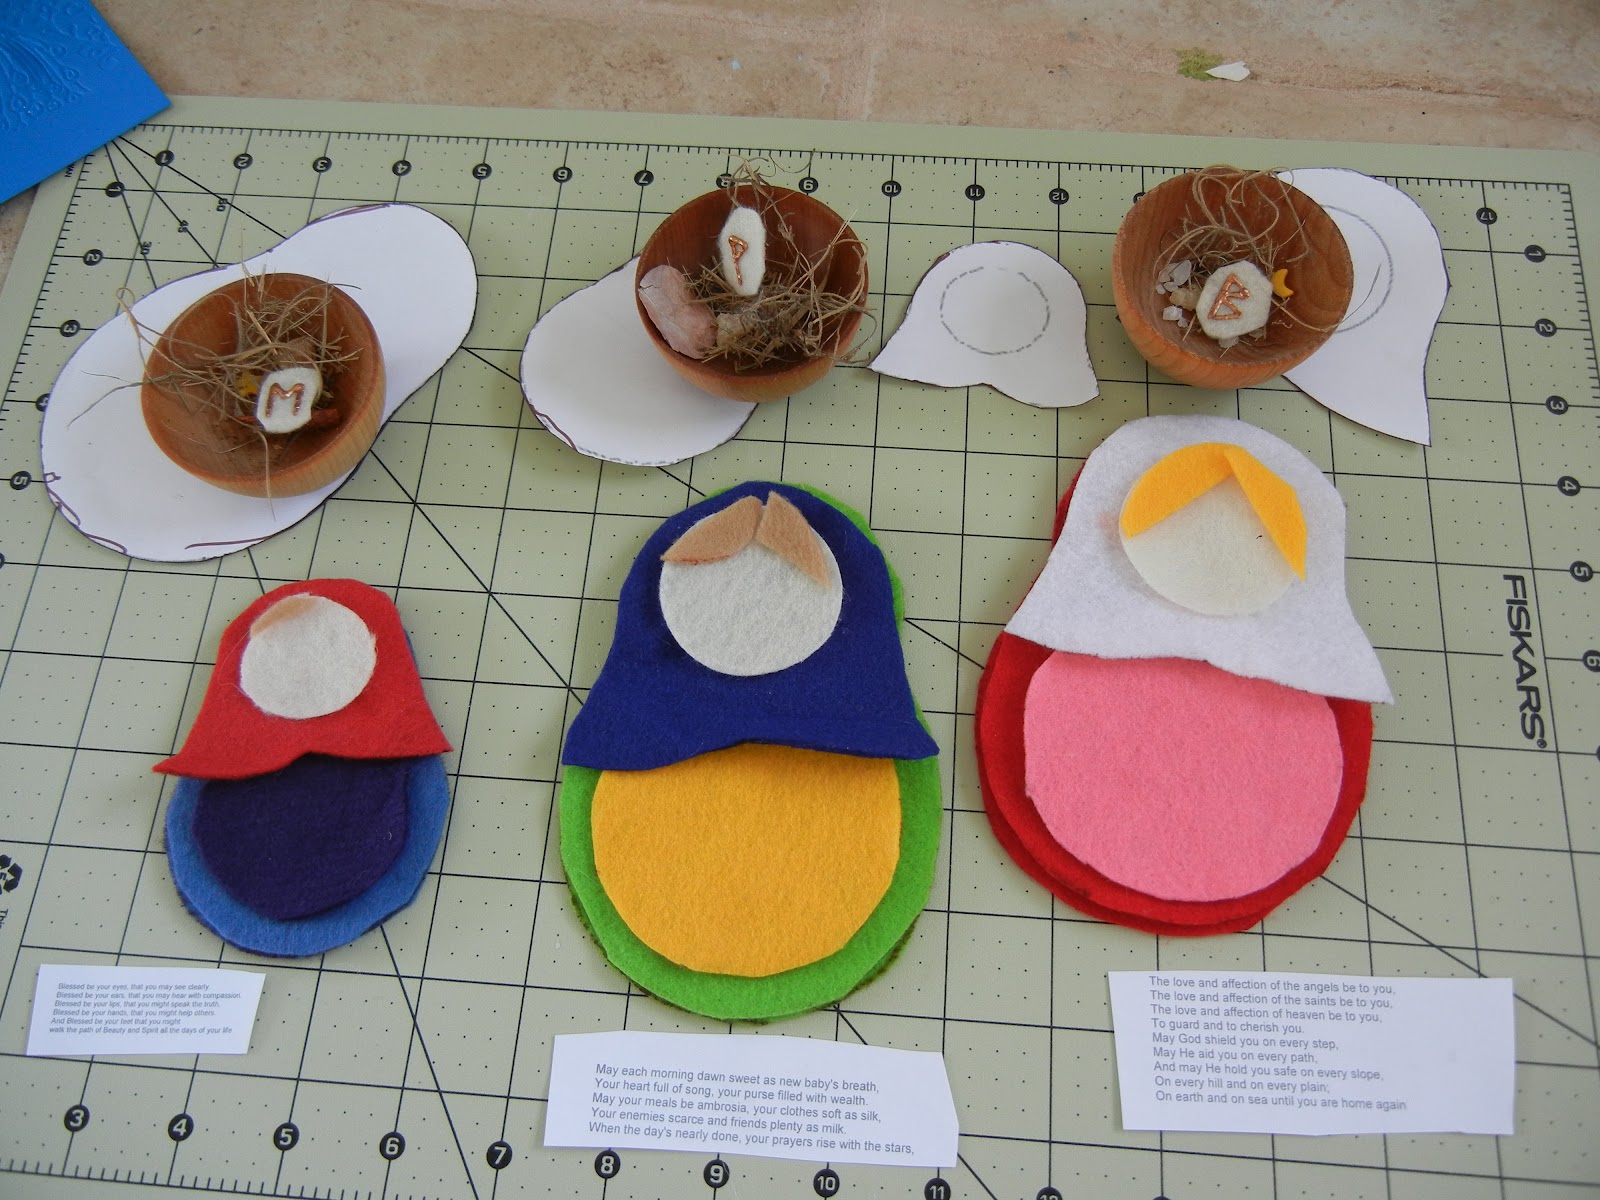
Once upon a time back in the dark ages when we were children we made gifts for the parents. Then we got older and bought gifts. As time marched on we realized our parents have everything already so are back to the making of gifts. So this year I made a Taurus feltie for my Dad. I used the pattern from Zodiac Felties.


DSCN0042I scanned the pattern page and then enlarge to get a decent size. This pattern was very simple so it didn't take me long to cut out the felt and lay out the pieces for sewing. A simple overhand stitch I can do. The pattern has ribbons on the horns but I went with the simple fabric paint. You could have lots of fun with pattern on the horns. I use gromments and some copper wire to make the nose with rings. Safety Eyes were inserted for some quick and easy eyes that did not involve me embroidering detail. Not my favorite thing. So after waiting on the fabric paint to dry all was put together and I had a loverly little feltie to give to my Dad. Makes ya feel young again.
Taurus Feltie
So wander the web for wonderful felt crafts ideas and have fun.

Saturday, December 15, 2012

Geek fest ornaments

While surfing the interwebs I have encountered some really nifty cool homemade geek ornaments out there.  So here are my favorites:


1.  Amigurumi Pi ornaments.  I admit to loving amigurumi, I wish I could do it and there are so many cute designs out there.  Any little amigurmi can be an ornament.  These were made by alicia954.
2.  When in doubt go with Dr. Who.  Polymer clay is a great media and you can make your own Tardis, or my favorite, the Dalek.  I have seen many weeping angel tutorials on how to turn Barbie into something terrifying (well at least more terrifying than she already is) to put on top of your tree.  This Dalek was made by headofheather and she has many cute geek ornaments for sale at her Etsy store.
3.  For the science nerd we have these cute periodic table ornaments.  A flat blank ornament, paper mache or wood.  Some white paint, stick on letters, a little santa hat, and you are ready to create your very own ornaments.  These can be found over on Artfire if you wish to purchase instead of making your own.
4.  Pokeman is very popular and I found this round ornament made from sequins for sale on Etsy.  If you are a very patient person you can take any round idea like Angry Birds, the Death Star, or even logos from your favorite game like Zelda or WOW (Alliance or Horde) and create your own.
5. And last but not least using those old circuit boards.  Cut them in cute themed shapes, punch a hole and you are done.  Recycling at its best.  You can the same with the old CD's to decorate or just cut in great shapes. 
 
So have a very happy holiday and let your tree truly show who you are.

Monday, December 3, 2012

Salt Dough Ornaments

Tis the season, fa la la.  Time for the funs and joys of holiday crafts.  If you would like a fun family craft or are a new household making salt dough ornaments is and easy way to craft decorations for the tree that are personal and best of all inexpensive.  All you need are some salt, flour, and cookie cutters, and of course and oven.  Salt dough ornaments can be as simple or complicated as you would like.  To make the dough first:

             1 cup salt
             4 cups of flour
             1 1/2 cup of water (add gradually)


Combine the salt and flour then pour in the water gradually, stopping when it has become dough-like and not too sticky. There should be no residue left on your fingers when you touch it. Knead it on a floured surface for a few minutes to make it soft, workable and stretchy, like you would with any dough. This step is wonderful for strengthening those small hand muscles essential for writing and cutting!

Lay them on some greaseproof or baking paper and on a baking tray. Cook them on a VERY low heat (around 225 F) for 3-4 hours. Keep an eye on them and watch for scorching.  If the shapes are over 1cm thick then they will probably need to be turned over during cooking.

 Tips for decorating
             Cut hole for string before cooking – use a straw, toothpick, or dowel.  Depending on how big you want the hole.
             Since it is dough you can make small embellishments to decorate.
             Use stamps to add a personal touch, rub ink in the stamped part to bring out the color.
             Use stamps to add a personal touch
             Use scrap booking skill for extras, nifty ribbons and charms


Now the fun part of these ornaments as they are good for any holiday or religion.  I made some Hanukkah ornaments for a friend using Hanukkah cookie cutters.  This is a nice weekend project and you can create some beautiful personal gifts for friends and family.  So have fun.

Monday, November 19, 2012

Magic City Half Marathon Review

Well I ran my 3rd half marathon the other weekend, had worst time yet at 2:13, bleah.  I did not train long distance enough and around mile 10 my legs started being unhappy.  By the finish line I was shufflin.  Ah well, time to run longer.  So to post my comments about the race.
The Swag Bag - swag, we have no swag.  Nice dry-fit shirt, standard for many races now.  And that was it.  Not even a little packet of Bio-freeze.
The Weather - BEAUTIFUL.  November is tricky and it turned out to be a cloudless day.  Right nippy in the morning but warmed up a bit.  I get hot when I run so the jacket was off by mile 1.  Breeze was blowing so every now and then as I chugged along I got a nice cooling breeze.
The Course - mostly flat, some hills at the end.  I would have preferred the hills at the front and flat at the end.  Went by historic/interesting locations of Bham - Legion Field, Rickwood Field, RailRoad Park.  Pretty standard city running.  They had a 5K at the same time which merged with us for about a mile.  It was disconcerting to be jogging along and all of a sudden you run into a pack of 5k walkers.
The volunteers - They were GREAT.  At every drink stop they cheered, and smiled while handing out the Gatorade/water/gel packs.
The Police - at every intersection (and there were a lot). They put the runners 1st and traffic second.  Waving some cars through the breaks in the runners, and yelling at the idiots on phones while driving. Thanks very much to them.
The Spectators - what, was there a race that weekend?  Not so much, mostly at the finish line.
The Food - standard after race fare of bananas, cookies, etc.  Did not see any other water/Gatorade stations other than the water I was handed at the finish line.  Cold pizza was also served, not horrible.  There was a mini beer garden which had some samples, no beer was served on the course.
Entertainment - hubby was my chauffeur, big thanks, and he just milled around for a couple of hours.
The Medal - Design was OK, did not see an engraving station (I'm to cheap to do that anyway).

Overall it just seemed a long jumped up 5K style run.  It was only the 2nd year and they have to compete with the Mercedes Marathon for sponsors so I guess they are still feeling their way around.  It was a good test run for Disney to let me know I need to run more, but I don't plan on attending next year.

Saturday, November 17, 2012

Half Marathon Fun

As we count down to the Disney Princess Half Marathon 2013 I decided to do a half marathon this year. So tomorrow I will be running in the Magic City Half Marathon.  Pray for me.  I admit to not running as much as I should so may be walking most of this half.  We shall see.  I did create some cute half and full marathon items on Cafe Press - Gryphonwycks.  The bad part about designing for CafePress and Zazzle is the design size.  It would be nice to make one design that fit on all their merchandise but they have different dimensions and different bleed areas.  Highly annoying. So time to surf the interwebs to see how others have dealt with this issue.  Now off to do a bit of a run before the torture tomorrow.  Good luck to all the runners out there.

Friday, November 9, 2012

Owl Wedding Cake Toppers

While surfing the web for Cute Hoots to pin on Pinterest I came across some owl wedding cake toppers.  They appeared to be salt/pepper shakers that had been decorated.  I followed a link to a web site DIY cake toppers and the photos are amazing.  You take a simple unpainted bisque salt/pepper shaker:

Any unpainted salt/pepper would work and make a nice themed idea for a wedding.  Once you have your shakers you can then decorate as you like.  The photos below are from the website linked above, these people have some mad skill.  I also think this would make a cute idea for christmas presents to a couple.


Saturday, September 29, 2012

Thor's Hammer Ceramic Ornaments

I am not the greatest ceramicist in the world but I do love making things.  So I decided to make some Thor's Hammer ornaments for my Etsy Shop.  Mjolnir has become very popular with Chris Hemsworth playing a very hot Thor so normal people have become more aware of the Norse myths. The ornaments I crafted are ceramic and designed to hang in the house or on yee ol' Yule tree.  Since I cannot draw I ordered some very nice stamps from Highlander Celtic Stamps.  The stamps I ordered were unmounted to be flexible on clay and did have a nice deep etching so the patterns were visible once stamped.  I have another set of Celtic symbol stamps but these are only good for paper and are to detailed for pottery.
I do believe the stamps turned out nicely giving a good pattern to the hammers.  I must try with some different glazes.

Monday, September 10, 2012

Owl Pumpkins

So it is now September which means October (aka HALLOWEEN) is almost here.  So since I love owls I was wandering the internet for fun things to pin to my Cute Hoots pinterest board when I came across owl pumpkins. 
Of course Martha Stewart has some of the most interesting.


Another fascinating take using sunflower seeds can be found at Better Homes & Gardens


For traditional carving here are some links to interesting owl patterns:
If you find a really good pattern and have talent you can always use the fake pumpkins found at craft stores and keep a good pumpkin year after year.

Saturday, September 1, 2012

More fun with ceramics

Well I've been having fun with cookie cutters and ceramics.  My best friends son recently did a tour on a NOAA ship tagging sharks, right during shark week too.  So I had a shark cookie cutter and was making ornaments for Gryphonwyck on Etsy and made some ornaments for them.
They turned out ok.  The octopus is kinda wonky looking though.  So I also made some druid charms, a few more Cthuluments, and some Auburn ornaments for friends.  Now if only stuff would sell so I could justify making more, agghh.

I am continuing to train for my half marathon.  So far still only doing about 3 miles cause it is hot as heck around here and I refuse to run at 6 am.  Not a morning person.  But Halloween is coming up and the costume stores will open soon so I can put together my outfit and as it gets cooler I can run longer. 

Off to do house work and I will leave with a big WAR EAGLE since my orange cat posed on a blue rug today:

Saturday, August 18, 2012

Cthulu-ments

Ah the joys of Lovecraft, and what could be better on your tree than some Cthulument.  I do like the way Lovecraft has created the Cthulu mythos that has spread to so much of our lives.  Most recent spotting for me was of course Warehouse 13 episode with the tentacle monster.  So I decided I needed some ornaments for my tree with a Cthulu theme.
I took ye old angel cookie cutter, since he does have wings, and created my ceramic lovelies.  I did not particularly care for how the Jade Moss glaze flowed, the two on the bottom.  The blue gray stoneware did a bit better with black in the accent areas.  I think I will try again and create some with arms and use a green glaze next.  Of course while photographing my creations for etsy I did receive some help from my cat.

Gotta love the critters.  Currently it is thundering so one of my dogs is cowering under the desk.
So don't forget to celebrate the holidays with the Elder Gods, or they might eat you. For sale at my Etsy shop Gryphonwyck

Sunday, August 5, 2012

Disney Princess Half Marathon

Continuing the training for the half marathon.  Still running about 3 miles at a time.  It is so hot here it is harder for me to go further.  My full time job and karate take up so much time I need to squeeze in some more running time.  Once it gets cooler than I can run after work, right now its just to hot.  Made my hotel reservations, staying off site where it is cheaper so will see how that works.  Hubby is going so he can drive and cheer since he is not running (to many knee issues).  The next phase is COSTUME. Once it gets closer to Halloween I should be able to find some ideas.  Still planning on being Maleficent, so far most people are princesses, I wanna be a fairy princess, whee.

Thursday, July 12, 2012

Disney Princess Half Marathon 2013

Yes I did it, I am officially registered for the princess half marathon. 

Step 1: get off my lazy derriere and jog more.  I admit I am doing around 2 miles at time right now so I really need to step it up.  Lets see if I can do at least 3-5 this weekend.  I did a half in 2011 and one in 2010 so I know I can do it, just need to stop being lazy.

Step 2: get my outfit, I still plan to be Maleficent so black and purple are the way to go.  Should be able to find some ideas around Halloween.

Step 3: Enjoy Disney and all the fun people, whee.

Sunday, July 1, 2012

Karate Pisces aka Fish of Fury

While wandering through Barnes & Noble came across a felt zodiac book, Zodiac Felties.  It had some really cute ideas so today I did the pisces one.  My friends who were shopping with me that day happen to be pisces and are some of my karate buds.  So I decided to make some "Fish of Fury"
As with all projects the first thing you do is move the cat out of the work space.  I copied the fish page and cut out my patterns in black and white instead of the recommended liliac and tangerine.  My fish are fighting, not fruity.  Originally I was going to use some leaf sequins that I had on hand but that didn't look to good so I went with black netting.
Mine don't look quite as good as the illustration but they are a nice group of fighting fish, fishermen beware.  I would recommend if you have the paperbck version to blow up the pattern a bit, these ended up a bit small.
Overall a cute book with a nice take on the zodiacs. 

Sunday, June 24, 2012

Blessing Dolls

Recently a friend of mine and her partner had a bouncing baby boy.  She asked that I do a blessing for them so I decided to create some blessing dolls.  1st you have to have a pattern.  I picked a Russian doll type pattern for felt I found on line at Dragon & Phoenix.  This is a site about a Mom with twins and she made hers into a tooth fairy pillow so this pattern fits many uses.

Print the parts of the pattern you like and expand/contract to the sizes you need.  Using the pattern cut out the felt.  I had some leftover felt from when I made my owlements.  My friend is a big Alabama fan so her doll is in red and white.  I cut the faces and the holes in the hair wrap the same size with my cuttlebug, next time I will cut the face part larger so it sits better behind the hair portion.


For the blessing packet that goes in each doll I gathered herbs relevant to what I wished for each person.  Cunningham's Encyclopedia of Magical Herbs was my resource.  I pulled a rune thinking of each person and re-created that rune with felt.  I then surfed the wonderful Internet for blessing poems, I can't write poetry so I had to go surfing.  Printed each poem real smalled and rolled them into little scrolls. The blessing items were placed in scrap of silk and sewn into a pouch.


I then added the decorations to the dolls with fabric paint and iron on flowers.  My sewing skills aren't all that great but you can add embroidered embellishments if you are more accomplished in that area.  You can also sew runes or other symbols on the dolls if you so desire.


Once they are ready sew the backs on, stuff with fiberfill, add the blessing pouch while praying to your deity.  And they are now ready to be gifted.  One happy littly doll family.


Children's Five Fold Kiss

Blessed be your eyes, that you may see clearly.
Blessed be your ears, that you may hear with compassion.
Blessed be your lips, that you might speak the truth.
Blessed be your hands, that you might help others.
And Blessed be your feet that you might
walk the path of Beauty and Spirit all the days of your life


Monday, June 18, 2012

Maleficent Marathon Set

Maleficent Marathon Set


I plan to do the Disney Princess Half Marathon in 2013, assuming I can afford the trip.  I'm not much of a princess person so I designed a Maleficent set, she is my favorite villain.  I would put my hair in pigtails with black/purple wrapping at the base to mimic the horns.  Must be comfortable for 13+ miles. So we shall see how my training goes.  I completed a half marathon in 2011 and 2010.  Need to find one for this year, maybe Chattanooga's bridges run.  So time to start packing on the miles and get myself in gear.

Sunday, June 17, 2012

Where have all the fantasy books gone

A couple of years ago I found Goodreads.com.  A lovely site that allows me to track the many books I read.  Over the past two years I have read around 100 books each year.  I am a bit of an addict when it comes to reading.  The problem I have had lately is I love fantasy books.  And by fantasy I mean wizards, magic, and evil sorcerer's.  When I query for fantasy all I get are Paranormal Romance and Young Adult.  They didn't even have young adult fantasy when I was that age.  Now I love a good PR just like everyone else (just finished Lover Reborn) but I can't live off candy alone.  I need MEAT.  So to all you fantasy novelist out there keep writing the hearty stuff.  I truly appreciate it.

Saturday, May 26, 2012

Cute owl nail design

While wandering the intewebs in search of fun stuff to pin I came across this fingernail tutorial for owls.  I adore owls (in case you haven't noticed) and thought I would share it.
This comes from the blog FlauntMe.  A cute site for beauty reviews etc.  I don't actually have any fingernails so I can't try this myself.  But for those who can, enjoy.

Sunday, May 20, 2012

Blodeuwedd the Owl Cross Stitch Pattern.

I was wandering the wonderful web and came across the most AMAZING cross stitch pattern for an owl.  It is the Blodeuwedd the Owl pattern by Celtic Art Studios.   They also have Tshirts, jewelry, and hangings.  It is a great site to wander around on.

Since I found the cross stitch pattern and I adore owls I thought I would post some nice links to other fun owl cross stitch patterns.

So here are some of my favorites.


So have fun stitching some nifty cool owls.

Wednesday, April 4, 2012

Recycled Easter

It's Easter time so the stores are full of pre-made baskets and individually wrapped candy and of course the plastic grass filler.  So I thought I would put in a few Easter ideas that were environmentally friendly in honor of Easter and Earth Day in the same month.

To make some eggs:
Tie Dye Egg Instructions from Country Woman Magazine
  1. Check the tie label to make sure it’s silk. Remove the lining, cut it into strips and set aside.
  2. Cut a piece of colored silk tie fabric large enough to fit around the entire egg.
  3. Wet the silk with cold water and wrap tightly around the egg, with the right side of the fabric facing the egg. Twist the ends tightly so the fabric is touching the entire surface of the egg. Wrap thread around each end and knot to hold the fabric in place.
  4. Wrap the lining strips around the entire egg. Hold them in place by wrapping and tying thread around the egg.
  5. After wrapping several eggs, place them in a single layer in a large saucepan. Add enough water to cover by 1 inch. Cover and bring to a boil over high heat. Remove from heat; cover and let stand 15 minutes. Place in ice water until completely cooled.
  6. Remove lining and silk fabric.
Now the basket:
  • Shredded paper can be used in place of the plastic grass, it can also be formed into a basket.  I found a handy tutorial for this project at The Junk Wave
  • Shoe boxes or oatmeal containers that you cover with paper can make cute baskets.


Some gifts for the basket:
  • Cute little bunny sachets from recycled fabric scraps: Bunny Sachets
  • From all those magnets you get on the yellow pages and business cards can be turned into egg magnets with an egg punch, or if you have bunny punches those would work too.  Just punch out the magnet and cover with leftover scrap booking paper or magazine pages.  Craftside has a nice description.
  • Take your old recycled clothes and turn them into stuffed critters.  A tutorial for a t-shirt bunny can be found at Chez Beeper Bebe.
Don't forget the chocolate (you have of course heard the latest news that chocolate helps you lose weight, don't know if true but I'm going with it.).
  • Cadbury Eggheads are box less so less waste.
  • Give preference to local and organic options.
  • Natural Candy Store has a lot of eco-friendly candies.
Once Easter is over don't forget to reuse what you can for next year for other crafts.  This is our only planet, please take care of it.

Sunday, March 25, 2012

It's bugaggeddon out there.

Even though it is March the June bugs are out.  Last night I couldn't go in from my front porch because it was COVERED in bugs.  Tried to take a pic but came out all fuzzy.  The cats are playing with the bugs, the dogs are eating them and getting sick.  I just love spring.  But the azaleas, dogwoods, and wisteria are blooming all over the place so it is lovely.

Monday, March 12, 2012

Recycle Bookmarks

I am an avid reader and I mostly get my books from the Library.  It is sacrilegious to bend the pages of another's book so I tend to have bookmarks stashed in various locations.  You can buy some very nice bookmarks or just use an old piece of paper but I like to make mine out of recycled materials.  So to do this project you need a Cuttlebug (my newest toy) or other embossing machine, some old drink cans, and a source of artwork (I am using an old calender).  Unpacking can be fun with assistance.

So once you have your items together it is time to get started.  1st you take the time to remove the cat from the bag and convince him sitting on the calender you want to cut up is not a good idea.  Take your picture source and cut to the size you find works best, one good example is 1.5" by 6".  My size varies depending on what I put on the bookmark and the picture involved.  I use old cardboard from my canned drink boxes on the back of the bookmark to provide stiffness.  Decoupage the picture you like onto the cardboard with something like Mod Podge, also cover the outside to provide some stability.

To create the metal embellishments cut the can with a pair of old scissors in the shape you desire.  Then run the metal through your embossing machine.  You can also use die cuts to create shapes if you don't want to freehand it.  The metal can be colored with alcohol inks or permanent markers to create some detail.  I use inks to give the overall piece a bit of color and then fill in the embossed areas with color using pens.  Using either glue or grommets attach the metal embellishment to the bookmark.  Punch a hole for your ribbon.  You can use yarn, string, etc and embellish with beads if you like.  Once you are done let it dry and you now have a unique bookmark.
If you do not want to embellish your bookmark you can simply take a picture you like and cut it to twice the width of the desired bookmark.  Fold the picture in half and glue the two portions together. It is recommended you wipe of excess glue and then place a book or such on top to make it dry flat.  Once done use contact paper on either side to seal the bookmark.  Punch a hole and decorate.

Other sources for recycled bookmark ideas:
So create your own bookmark and save the pages from bending.


Saturday, March 3, 2012

Adventures in Amigurumi

I recently discovered the wonderful world of Amigurumi.  There are the cutest little critters out there.  So my plan it to try some of these.  I have watched a few videos on YouTube, one from WireMySoul who had a nice little tutorial on the basic stitches and what they are.  I find I learn better from viewing, I have a book but trying to figure out from just a book drawings can be hard.  Wandering the web there are tons of free patterns out there you can find that are simple and can be used to learn.  Below are a couple of patterns I would like to try.  We shall see how my versions turn out.

Gnome Pattern


Owl Pattern

Saturday, February 25, 2012

What to do with old books

I recently did some serious cleaning in my library so I had to a purge of books.  Books I've purchased, read, and probably won't read again.  Now what to do with them is the question.

  • Sell the books. 
    • Places like Amazon,  and  Half (an ebay company) will provide you a way to list your books but they do take a commission when sold.
    • The good ol' garage sale.  Next time your neighborhood has one join the fun and get rid of those books and get some folding money.
    • Used book stores.  Many towns have a small used book store that will take books and give you store credit or actual cash.
  • Donate the books.
    • Your local library.  Libraries have book sales to raise money and it is always good to support your local library.
    • Homeless shelters.  Reading is a great way to escape the harshness of life and is a healthier addiction than drugs or alcohol.
    • Goodwill, Women's Shelters, and Prison systems also appreciate the books that can be resold to provide funds for their good works.


  • Online swaps. 
    • The Internet is great source for finding others who have books you would like to read and who would enjoy reading your books.  Most of these sites link you to others and you simply pay the media shipping rate.
  • Crafts.  Upcycling is always good.  If you google upcyled books and query the images you can find some great ideas.
    • Create an invisible bookshelf.  Use a large old hardback book as the shelf.
    • Recycled book purse.  Craftingagreenworld has a good tutorial on turning a hardback book into a purse.
    • Use old printed pages and print graphic art onto them.  You can find some wonderful examples on Etsy.
    • Use the printed pages cut into strips and create paper mache art.

Tuesday, February 21, 2012

Easy ladder for your library.

Over the years I have accumulated a lot of books, I mean a ton of books.  When we converted the old garage into a library for me we had a one and a half story space so I got bookshelves that go waayyyy up.  I am in the middle of cleaning in this photo, a never ending project.
As you can see the shelves are pretty tall so you need help to get to the top ones.  I really wanted one of those neat rolling ladders but that wasn't practical and way out of my budget.  So what do we do, we go to Lowes (or your local handyperson store).  I purchased a simple wooden step ladder and decided how to decorate.  Way back in the day some books would come with illustrations so I went through my library and discovered Anne McCaffery's Coelura.


Once you have picked your book the best thing to do is to copy the photos instead of destroying the book.  Of course if the book is in bad shape I would use the original book pages.  I copied my pictures onto a beige antique looking paper and used scrapbooking scissors to cut the edges.  I put a light stain on the ladder first and them began applying the pictures.  I used regular glue, Mod Podge works great and glues the pictures on wrapping them around the ladder steps and sides.  I then took a stamp and applied some decorative elements.  To finish off I covered the whole thing in a clear coat to protect it.  I did this project a number of years ago and it has held up quite well. 
Looking down on the ladder
Side View
 Overall the ladder did turn out nicely and is a great inexpensive way to get the job done.