Showing posts with label decorate. Show all posts

Saturday, December 15, 2012

Geek fest ornaments

While surfing the interwebs I have encountered some really nifty cool homemade geek ornaments out there.  So here are my favorites:


1.  Amigurumi Pi ornaments.  I admit to loving amigurumi, I wish I could do it and there are so many cute designs out there.  Any little amigurmi can be an ornament.  These were made by alicia954.
2.  When in doubt go with Dr. Who.  Polymer clay is a great media and you can make your own Tardis, or my favorite, the Dalek.  I have seen many weeping angel tutorials on how to turn Barbie into something terrifying (well at least more terrifying than she already is) to put on top of your tree.  This Dalek was made by headofheather and she has many cute geek ornaments for sale at her Etsy store.
3.  For the science nerd we have these cute periodic table ornaments.  A flat blank ornament, paper mache or wood.  Some white paint, stick on letters, a little santa hat, and you are ready to create your very own ornaments.  These can be found over on Artfire if you wish to purchase instead of making your own.
4.  Pokeman is very popular and I found this round ornament made from sequins for sale on Etsy.  If you are a very patient person you can take any round idea like Angry Birds, the Death Star, or even logos from your favorite game like Zelda or WOW (Alliance or Horde) and create your own.
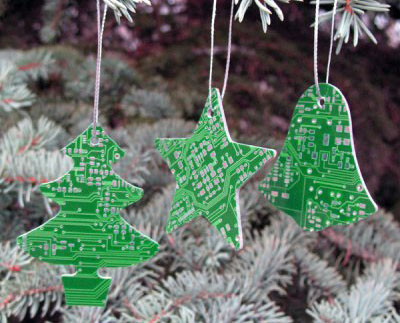
5. And last but not least using those old circuit boards.  Cut them in cute themed shapes, punch a hole and you are done.  Recycling at its best.  You can the same with the old CD's to decorate or just cut in great shapes. 
 
So have a very happy holiday and let your tree truly show who you are.

Sunday, June 24, 2012

Blessing Dolls

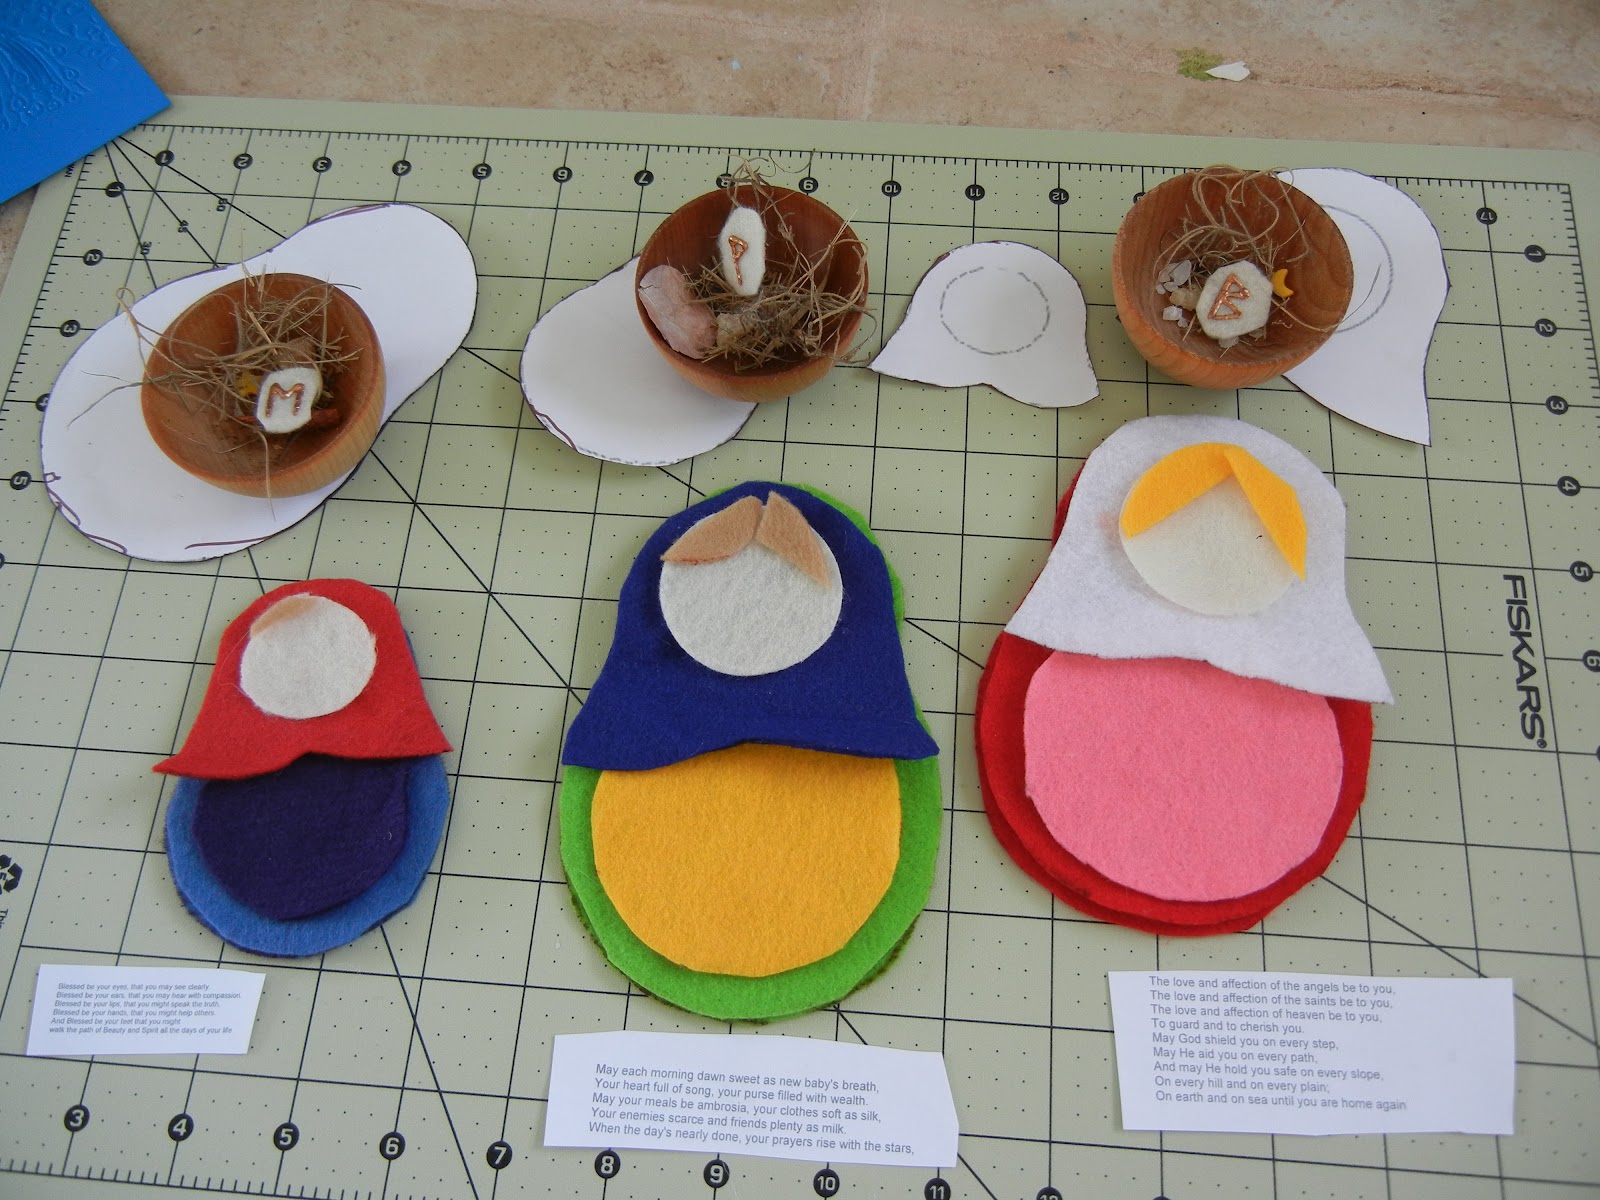
Recently a friend of mine and her partner had a bouncing baby boy.  She asked that I do a blessing for them so I decided to create some blessing dolls.  1st you have to have a pattern.  I picked a Russian doll type pattern for felt I found on line at Dragon & Phoenix.  This is a site about a Mom with twins and she made hers into a tooth fairy pillow so this pattern fits many uses.

Print the parts of the pattern you like and expand/contract to the sizes you need.  Using the pattern cut out the felt.  I had some leftover felt from when I made my owlements.  My friend is a big Alabama fan so her doll is in red and white.  I cut the faces and the holes in the hair wrap the same size with my cuttlebug, next time I will cut the face part larger so it sits better behind the hair portion.


For the blessing packet that goes in each doll I gathered herbs relevant to what I wished for each person.  Cunningham's Encyclopedia of Magical Herbs was my resource.  I pulled a rune thinking of each person and re-created that rune with felt.  I then surfed the wonderful Internet for blessing poems, I can't write poetry so I had to go surfing.  Printed each poem real smalled and rolled them into little scrolls. The blessing items were placed in scrap of silk and sewn into a pouch.


I then added the decorations to the dolls with fabric paint and iron on flowers.  My sewing skills aren't all that great but you can add embroidered embellishments if you are more accomplished in that area.  You can also sew runes or other symbols on the dolls if you so desire.


Once they are ready sew the backs on, stuff with fiberfill, add the blessing pouch while praying to your deity.  And they are now ready to be gifted.  One happy littly doll family.


Children's Five Fold Kiss

Blessed be your eyes, that you may see clearly.
Blessed be your ears, that you may hear with compassion.
Blessed be your lips, that you might speak the truth.
Blessed be your hands, that you might help others.
And Blessed be your feet that you might
walk the path of Beauty and Spirit all the days of your life


Tuesday, February 21, 2012

Easy ladder for your library.

Over the years I have accumulated a lot of books, I mean a ton of books.  When we converted the old garage into a library for me we had a one and a half story space so I got bookshelves that go waayyyy up.  I am in the middle of cleaning in this photo, a never ending project.
As you can see the shelves are pretty tall so you need help to get to the top ones.  I really wanted one of those neat rolling ladders but that wasn't practical and way out of my budget.  So what do we do, we go to Lowes (or your local handyperson store).  I purchased a simple wooden step ladder and decided how to decorate.  Way back in the day some books would come with illustrations so I went through my library and discovered Anne McCaffery's Coelura.


Once you have picked your book the best thing to do is to copy the photos instead of destroying the book.  Of course if the book is in bad shape I would use the original book pages.  I copied my pictures onto a beige antique looking paper and used scrapbooking scissors to cut the edges.  I put a light stain on the ladder first and them began applying the pictures.  I used regular glue, Mod Podge works great and glues the pictures on wrapping them around the ladder steps and sides.  I then took a stamp and applied some decorative elements.  To finish off I covered the whole thing in a clear coat to protect it.  I did this project a number of years ago and it has held up quite well. 
Looking down on the ladder
Side View
 Overall the ladder did turn out nicely and is a great inexpensive way to get the job done.