Showing posts with label cuttlebug. Show all posts

Saturday, December 15, 2012

Geek fest ornaments

While surfing the interwebs I have encountered some really nifty cool homemade geek ornaments out there.  So here are my favorites:


1.  Amigurumi Pi ornaments.  I admit to loving amigurumi, I wish I could do it and there are so many cute designs out there.  Any little amigurmi can be an ornament.  These were made by alicia954.
2.  When in doubt go with Dr. Who.  Polymer clay is a great media and you can make your own Tardis, or my favorite, the Dalek.  I have seen many weeping angel tutorials on how to turn Barbie into something terrifying (well at least more terrifying than she already is) to put on top of your tree.  This Dalek was made by headofheather and she has many cute geek ornaments for sale at her Etsy store.
3.  For the science nerd we have these cute periodic table ornaments.  A flat blank ornament, paper mache or wood.  Some white paint, stick on letters, a little santa hat, and you are ready to create your very own ornaments.  These can be found over on Artfire if you wish to purchase instead of making your own.
4.  Pokeman is very popular and I found this round ornament made from sequins for sale on Etsy.  If you are a very patient person you can take any round idea like Angry Birds, the Death Star, or even logos from your favorite game like Zelda or WOW (Alliance or Horde) and create your own.
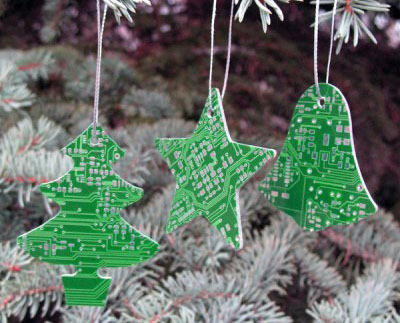
5. And last but not least using those old circuit boards.  Cut them in cute themed shapes, punch a hole and you are done.  Recycling at its best.  You can the same with the old CD's to decorate or just cut in great shapes. 
 
So have a very happy holiday and let your tree truly show who you are.

Sunday, June 24, 2012

Blessing Dolls

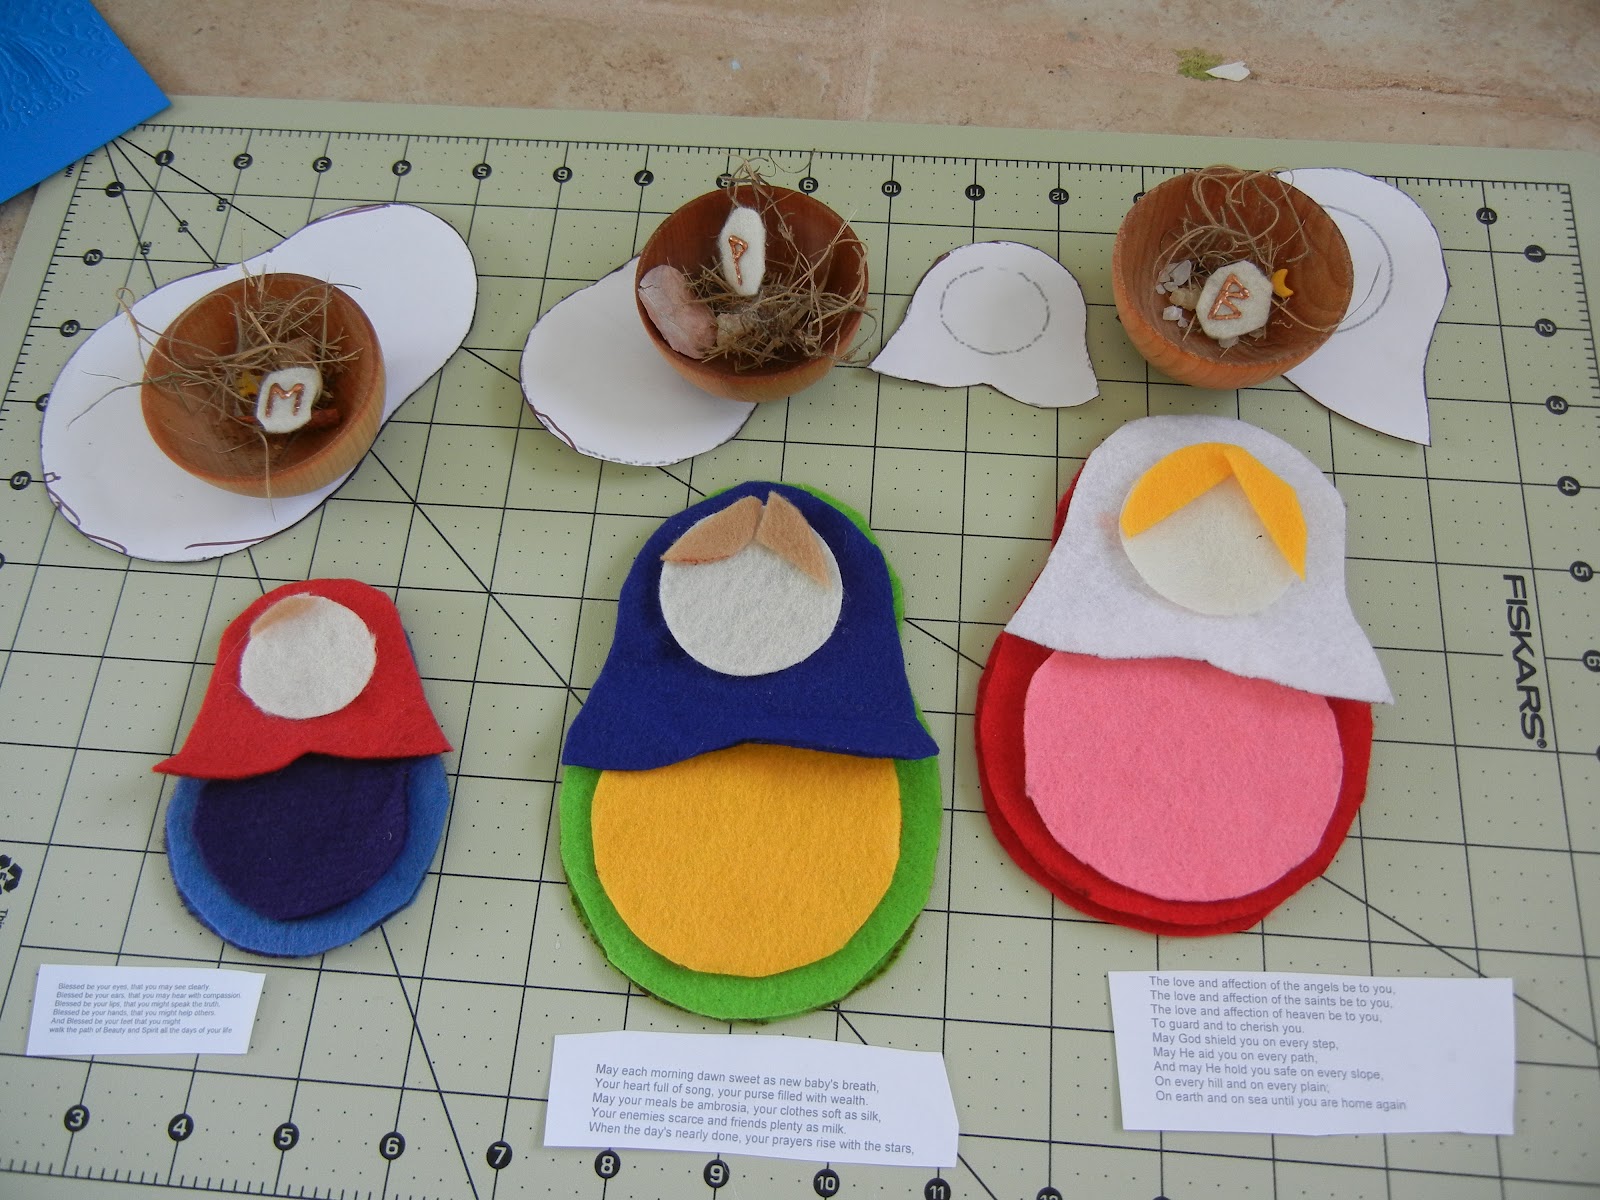
Recently a friend of mine and her partner had a bouncing baby boy.  She asked that I do a blessing for them so I decided to create some blessing dolls.  1st you have to have a pattern.  I picked a Russian doll type pattern for felt I found on line at Dragon & Phoenix.  This is a site about a Mom with twins and she made hers into a tooth fairy pillow so this pattern fits many uses.

Print the parts of the pattern you like and expand/contract to the sizes you need.  Using the pattern cut out the felt.  I had some leftover felt from when I made my owlements.  My friend is a big Alabama fan so her doll is in red and white.  I cut the faces and the holes in the hair wrap the same size with my cuttlebug, next time I will cut the face part larger so it sits better behind the hair portion.


For the blessing packet that goes in each doll I gathered herbs relevant to what I wished for each person.  Cunningham's Encyclopedia of Magical Herbs was my resource.  I pulled a rune thinking of each person and re-created that rune with felt.  I then surfed the wonderful Internet for blessing poems, I can't write poetry so I had to go surfing.  Printed each poem real smalled and rolled them into little scrolls. The blessing items were placed in scrap of silk and sewn into a pouch.


I then added the decorations to the dolls with fabric paint and iron on flowers.  My sewing skills aren't all that great but you can add embroidered embellishments if you are more accomplished in that area.  You can also sew runes or other symbols on the dolls if you so desire.


Once they are ready sew the backs on, stuff with fiberfill, add the blessing pouch while praying to your deity.  And they are now ready to be gifted.  One happy littly doll family.


Children's Five Fold Kiss

Blessed be your eyes, that you may see clearly.
Blessed be your ears, that you may hear with compassion.
Blessed be your lips, that you might speak the truth.
Blessed be your hands, that you might help others.
And Blessed be your feet that you might
walk the path of Beauty and Spirit all the days of your life


Monday, March 12, 2012

Recycle Bookmarks

I am an avid reader and I mostly get my books from the Library.  It is sacrilegious to bend the pages of another's book so I tend to have bookmarks stashed in various locations.  You can buy some very nice bookmarks or just use an old piece of paper but I like to make mine out of recycled materials.  So to do this project you need a Cuttlebug (my newest toy) or other embossing machine, some old drink cans, and a source of artwork (I am using an old calender).  Unpacking can be fun with assistance.

So once you have your items together it is time to get started.  1st you take the time to remove the cat from the bag and convince him sitting on the calender you want to cut up is not a good idea.  Take your picture source and cut to the size you find works best, one good example is 1.5" by 6".  My size varies depending on what I put on the bookmark and the picture involved.  I use old cardboard from my canned drink boxes on the back of the bookmark to provide stiffness.  Decoupage the picture you like onto the cardboard with something like Mod Podge, also cover the outside to provide some stability.

To create the metal embellishments cut the can with a pair of old scissors in the shape you desire.  Then run the metal through your embossing machine.  You can also use die cuts to create shapes if you don't want to freehand it.  The metal can be colored with alcohol inks or permanent markers to create some detail.  I use inks to give the overall piece a bit of color and then fill in the embossed areas with color using pens.  Using either glue or grommets attach the metal embellishment to the bookmark.  Punch a hole for your ribbon.  You can use yarn, string, etc and embellish with beads if you like.  Once you are done let it dry and you now have a unique bookmark.
If you do not want to embellish your bookmark you can simply take a picture you like and cut it to twice the width of the desired bookmark.  Fold the picture in half and glue the two portions together. It is recommended you wipe of excess glue and then place a book or such on top to make it dry flat.  Once done use contact paper on either side to seal the bookmark.  Punch a hole and decorate.

Other sources for recycled bookmark ideas:
So create your own bookmark and save the pages from bending.